My Experience installing SCORCH 2012 RC
Server Details
| Server Name | Server Role | Operating System |
| OMMS1 | Orchestrator 2012 role server | Windows 2008 R2 Standard |
| OMDB | SCORCH Database | Windows2008 R2 Enterprise and SQL 2008 R2 Enterprise |
Account details
| LAB\ scorchsvc | SCORCH Management, Runbook, and Monitor Account |
| LAB\ ScorchUsers | SCORCH users security global group |
1. Install SCORCH 2012:
· Log on using your domain user account that is a member of the ScorchUsers group.
· Run Setuporchestrator.exe

· Click on Install
· Provide the Product registration information and click Next.

· Accept the license agreement and click Next.

· Check all boxes on the getting started screen for:
o Management Server
o Runbook Server
o Orchestration console and web service
o Runbook Designer
· Input the service account “scorchsvc” and input the password, domain, and click Test. Ensure this is a success and click Next.

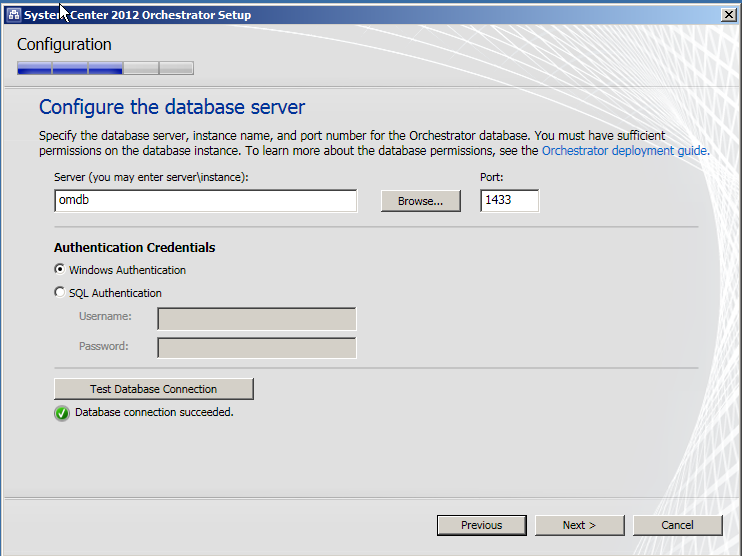
· Configure the database server. Type in the local computer name if you installed SQL on this SCORCH Server, or provide a remote SQL server (and instance if using a named instance) to which you have the “System Administrator” (SA) rights to in order to create the SCORCH database and assign permissions to it. Test the database connection and click Next.
· Specify a new database, Orchestrator. Click Next.

· Browse AD and select your domain global group for ScorchUsers. Click Next.

· Accept defaults for the SCORCH Web service ports of 81 and 82, Click Next.

· Accept default location for install and Click Next.

· Select the appropriate options for Customer Experience and Error reporting. Click Next.

· Click Install.

· Setup will install all roles, create the Orchestrator database, and complete very quickly.

· Make a directory on the local SCORCH server such as “C:\Integration Packs”
· Copy to this directory, the downloaded IP’s that shipped with the RC, such as the following:
· virtual_machine_manager_2012_r2_integration_pack.oip
· service_manager_2012_integration_pack.oip
· operations_manager_2007_integration_pack.oip
· operations_manager_2012_integration_pack.oip
· data_protection_manager_2012_integration_pack.oip
· configuration_manager_2012_integration_pack.oip
· Open the Deployment Manager console
· Expand “Orchestrator Management Server”
· Right click “Integration Packs” and choose “Register IP with the Orchestrator Management Server”

.
· Click Next, then “Add”. Browser to “C:\Integration Packs” and select all of the OIP files you copied here. You have to select one at a time and go back and click “Add” again to get them all.


· Right Click “Integration Packs” again, this time choose “Deploy IP to Runbook server or Runbook Designer”.

· Click Next, select all the available IP’s and click Next.


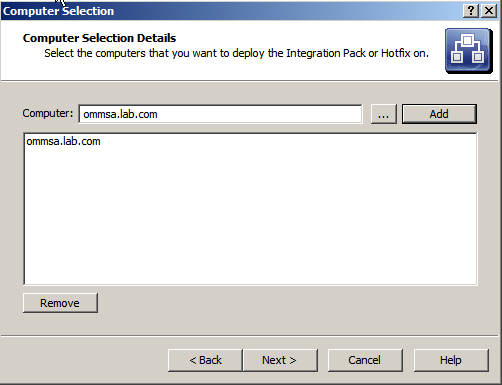
· Type in the name of your Runbook server role name, and click Add.
· On the scheduling screen – accept the default (which will deploy immediately) and click Next.


· Click Finish. Note the logging of each step in the Log entries section of the console.